How to Make a Pull-Through Braid - 6 steps
What is called a pull-through braid is basically a ponytail consisting of a number of smaller ones to make it look like a spiffy plait. It may seem sophisticated but it is not and is much easier to perform than its French analogue.
Easy 6-Step Guide to Make Your Splendid Pull-Through Braid

Step 1: Arrange a ponytail of combed hair. Pull on strands to add some volume to your hair from roots to the hair tie.
Step 2: Take a small lock from beneath the ponytail to disguise the hair tie by covering it with the strand turn by turn. Then fix the end with hair slide.
Step 3: You need an out strand from both sides of the ponytail, arrange them together in symmetric way with a hair elastic. Carefully pull each strand to make it look puff.
Step 4: Do as you did before for another pair of strands but now arrange this small ponytail the way the upper is under the lower one, so each subsequent ponytail covers that base of the previous.
Step 5: Go on with the plait, using hair ties to fix each pair of locks. Don’t forget to add volume to the strands to have even smaller sections look dimensional to agree with the rest of the hairstyle.
Step 6: When the last strands are pulled together and your pull-through braid is just the way you like, use some hairspray for longer look. Light-hold will do best. Add some refined touch with small casual locks going around your face.
Every next time your braid will look better adding zest whether to everyday or official outfits. Feel free to try other variations of the braid to impress people around with your amazing figure
You Might Also Like
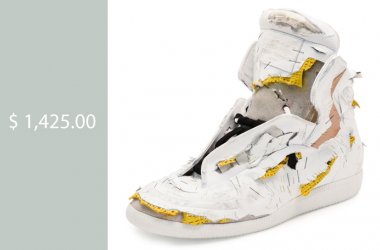
Maison Margiela Future Destroyed
Trendy sneakers from designer Maison Margiela, and the most fashionable collection - Destroyed Future High-Top. These trashy shoes not really a trash. You'd be most fashionable person at hipster's party just for $ 1.425,00 ...
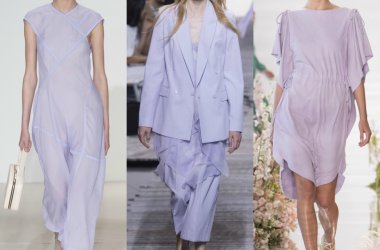
Top Main Spring 2018 Trends
With famous fashion shows over it is time to parse them through and define leading trends of the ensuing year. Art-Encouraged - Works of outstanding artists such as Andy Warhol (in New York) or Giuseppe Arcimboldo (in Paris) have found their way on the runway this time. Ornaments - This …...

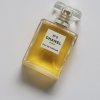
How to Choose a Wedding Perfume?
January 20, 2018 at 11:52a.m.

Wedding Dress Trends
January 20, 2018 at 10:55a.m.

How to find personal hair stylist?
January 20, 2018 at 3:02p.m.

White Haircuts for Black Skin
January 20, 2018 at 12:06p.m.

What Cause Hair Loss?
January 19, 2018 at 8:27p.m.

Groom wedding look
January 17, 2018 at 12:43p.m.

10 Red Hair Ideas
January 20, 2018 at 1:47p.m.

10 Long Hairstyles for Women 40+
January 20, 2018 at 2:22p.m.